Friday, December 30, 2011

Sanding, Liming, Finishing.


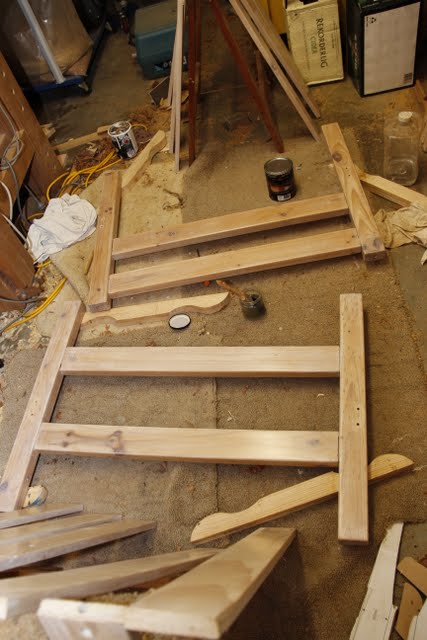
A quick update on the Bed Restoration Project. The simple radiata pine was sanded back 120, 180, 240, 300 with random orbit and the round over by hand. The timber then sealed with shellac and sanded again.


I chose a finish to match the Shaker Toy Chests. I'm using the same liming agent which is applied then wiped off the make the white shade. Then I'm using the thicker/ tougher feast watson satin varnish rather than the minwax poly which although nice to apply dented easily on the toy chest.


One day I'll clean up the shed...

Tuesday, December 27, 2011

Boxing Day Salad on a Lazy Larry Board


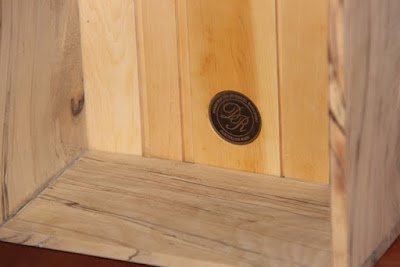
This Christmas I gave away a custom made end grain chopping board from Larry at Lazy Larry Woodworks. This is the fourth board I've purchased from Larry. It is a solid Australian made product and once again delivery was on time.


The board is 400 x 460 x ~30mm in size. Formed from Australian timbers Melaluca, Acacia, and Mango. And made in the 'Double Step' design. The wood fibres are arranged vertically resulting in the 'end grain' surface. Not only is this more decorative and stable, but it is also gentler on the knifes as the fibres will split around the blade.

For more information check out Larry's website or email him directly.

Saturday, December 24, 2011

Merry Christmas


Christmas in Australia is a great celebration. It’s a time to remember the year gone by, a time of rest, a time to eat lavishly, a time to decorate the office and home, and a time for friends and family.

Christmas traditions have a rich and eclectic history. Our modern plump and generous Santa stems from legends of Saint Nicholas, the fourth century Turkish bishop. The plastic Christmas tree that fills our lounge room is inspired by a sixteenth century German tradition. And elves… actually I don’t know how elves fit into it.

In our family, at Christmas we celebrate the birth of Jesus. We remember that God entrusted a young faithful mother with bringing Him into the world. And we are mindful that He did not remain a baby in a manger, but grew up to teach of God’s love and purpose, and to fulfil His mission as the one who would bear the punishment for humanity’s rejection of God.

 For to us a child is born, to us a son is given, and the government will be on his shoulders. And he will be called Wonderful Counsellor, Mighty God, Everlasting Father, Prince of Peace. – Isaiah 9:6.

Tuesday, December 13, 2011

Henry Eckert: New Australian based Tool Merchant


Just a quick heads up on a new Australian Tool Company. Henry Eckert: Merchant is based in South Australia as a sister company to the Australian distributors of Lie Nielson Toolworks. Worth checking out. 

I managed to pick up two Lost Art Press books, and now just have to wait for the posty.

Monday, December 12, 2011

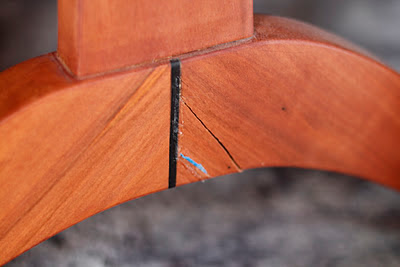
A cracking bad time...

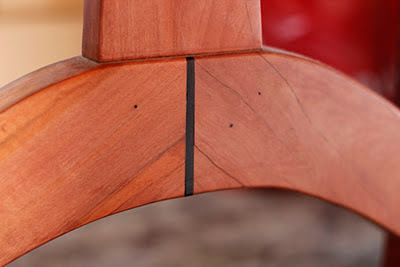
When people see my anniversary table the curved trestle legs attract the most questions and comments. Based on old Shaker design its slender form allows foot room for people sitting on the ends.


The first table I built of this design had a heavier set form made of a single piece of blackbutt. Other woodworkers often commented that it would be weak in the ankles. Pivoting forces applied across a relatively short piece of horizontal grain would cause fracture. (Btw. it never has.)


To correct this problem the new design is made of two pieces of timber angled such that the long grain is parallel to the ankles making the ankles much stronger. The two pieces are joined by a sliding dovetail and then two through tenons from the centre piece. (Details here.)


However, as you can see there are some cracks forming. The sliding dovetail edges are short grain and relatively thin. To fix this I'll pry it gently open and fill with epoxy. However, next time we'll need a better design. Ultimately bent laminations later shaped will replace this design.


Sunday, October 23, 2011

Shaker Box #2


The toy box itself was completed prior to Christmas 2010. However, it wasn’t until last week that the soft down flap stay was installed completing the project and making it toddler safe.
There’s a few differences between Box #1 and #2. 1# has a variable resistance gas strut rather than the soft down flap. 2# has dovetailed skirting boards and has been limed.
Timber: Radiata Pine. Dimensions: 800×400×480mm. Glue: Titebond III Joinery: Various, Dovetailed, Tongue & Groove, Stepped Panel and Frame. FinishFeast Watson Liming Agent, Minwax Wipe on Poly Matte, Ubeaut Natural Wax. Hardware: Zinc piano hinge (sourced from Bunnings), and soft down flap stay. (sourced from Lee Valley.)


Friday, October 21, 2011

Tasmanian Timbers Clock Complete


Tasmanian Timbers Clock
Timbers: Panels Huon Pine, Case Blackheart Sassafras, Inlay Sassafras and Ebony.
Joinery: Mitred Hand Cut Dovetails. Glue: Epoxy for the case. Hide for the panel.
Movement: Continuous Sweep from Let's Make Time Clock Company
Finish: ROS Sanded to 240. Shellac. Organoil (Tung Oil).


Saturday, October 15, 2011

New Project: Bed Restoration


It may not be my most creative project but the bed restoration will certainly be useful. These pictures show one half of the bunks I slept on as a child. Now recovered from under my parents house it needs a little work. The restoration shouldn't be too bad. The plan will be to sand back to thin varnish (and thicknessner marks), sand and round the rough routing work, lime (similar to a white stain) to match the toy chest, and apply a fresh varnish layer. Hopefully it will prove to be a simple project.


Sneak Peak: Tasmanian Clock


After a quick sand I applied the second and final layer of oil. Next Friday I'll apply a thin coat of wax in time for delivery Saturday. Better late then never...

Wednesday, September 21, 2011

Letter of the week: Andy on the Roubo


Hey Dan,
My name is Andy and I'm about to begin making my own roubo workbench. I have been particularly interested in your build as I'll be using blackbutt from Mal Ward also (arrives Wednesday).
I was just wondering how you found working with blackbutt? And if you got much tearout when planing, and how you dealt with it? I have a few high angle planes which should help working with this dense timber.
Andy

Thanks for the email Andy. With a few details to go, officially my Roubo Workbench is a work in progress. That being said it remains a workhorse of my shop. I never considered it a work of art, it's a little rough, has some tear out (and now scratches), but is solid and works well.

There are pro's and con's to using Coastal Blackbutt. Advantages include being light in colour, solid, hard, and heavy (900kg m^3). Disadvantages include it's plain, solid, hard, and heavy (900kg m^3).

It was hard to work with tools. On average metals (such as my cheap chisels) at 25 degrees I found they would blunten within 5-10 blows. My planes would noticeably not cut as well after 5minutes of work. I would suggest using harder metals such as A2 steel if you have them, higher angle bevels (say 30-35), and sharpening often.

I only had one section that had significant fiddleback which was difficult to tame. My standard angle planes managed ok if I kept them sharp, a radius on the blade, and sole waxed. A high angle plane will reduce tear out but increase work on you and the blade. Like all things you'll need to trial it and see how you go.

Although I try to concentrate on hand-tools I would recommend using as many powertools has you have. I used a 3HP planer for machining and belt sander to solve some tear out issues.

Good luck with the project. I'm keen to hear how it goes. Let me know if you have any other questions.

Sunday, September 18, 2011

The clock that ran out of time...

After three days of solid work in the shed the clock remains incomplete. Although I can appreciate the irony of the clock that ran out of time, I'm disappointed to have missed the delivery date and tomorrow I go back to work. 

Here's the progress to date. 


There's only a few things to do. I need to sand back that messy glue. Attach the clock-face. Final sanding. Install the movement and hands. Attach the half-lap back. And oil. So close but so far away.

Friday, September 16, 2011

Half-lap huon


The back of the clock is formed by half-lapped 9mm huon pine strips. I made the rabbets which form the half-lap with a veritas small plow plane.


After sanding to 240 grit with the random orbit sander I took the time to insert my marker. A 35mm forsner bit and a little epoxy made easy work of that. (Easier then when the case is assembled.)


The strips are intentionally irregular sizes - intentional imperfections. It adds a charm to a simple modern style.


A little sneak peak. The clock face is now sanded and the plugs flush. 

Clock Carcass


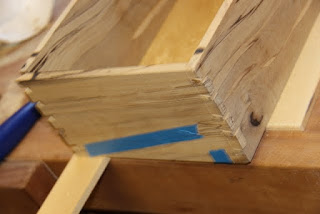
The main carcass for the clock is made from Blackheart Sassafras. The "Blackheart' name reflects the timber's variegated colour formed from fungal spalting. Although an attractive timber it proved exceptionally difficult to work. Although the timber is soft (yet somewhat fragile) the spalted lines were considerably weak especially in the thin 9mm pieces. Several times while working the wood large pieces would split and fall apart. In the following pictures you'll see where I've epoxied and taped it back together.


Before resawing I attempted to stablise the timber by filling any voids with black epoxy. (Much like I did in the background with brown epoxy and blackbutt burl.)


The board was re-sawed into two 9mm boards. (See previous post for details.)


The corners of the carcass are dovetails. (See previous posts on how I dovetail.) The front and rear pin/tail are mitred to hide the back rabbet and match the clock moulding.


Not a very good photos but you get the idea. The bits of tape tell you there was multiple splits in the timber.


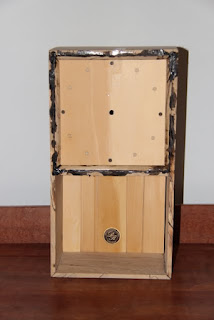
A small shelf lies halfway up the case to hold the base of the clock. The gap behind the shelf is intended for a hand to adjust the clock movement.


The inside moulding is mitred 9mm round over sassafras which will hold the clockface. The moulding was rounded by hand with a no 7 plane and sandpaper.


The glue up was messy. I used epoxy mixed with micro-fibre filler and black oxide concrete dye to produce a black gel. I opted for this method as I've run out of PVA and the black lines that remain after sanding match well with the blackheart sassafras.

Like at Facebook

Redbubble