Thursday, July 29, 2010

The Sandpaper Man


Just wanted to give a shout out to The Sandpaper Man. Not a paid advertisement, just wanted to share a positive experience. This is the third time I've used this company and always had excellent prompt service. I placed my order 1000am Tuesday, had shipping confirmation 1530 Tuesday, and parcel arrived today (Thursday). Cost wise they are competitive or a fraction cheaper than the main stores. They also stock of micromesh which I use with hard burnishing oil.


Wednesday, July 28, 2010

Square Peg in a Round Hole (aka. making dowel)

As a little indulgence I'm going to use ebony dowel (disopyros sp.) for the joinery in the Anniversary Table. I purchased this small piece from Trend Timbers at the Sydney Wood Show which today I started forming into dowel.


In the past I've used a small lathe to produce dowel for a similar purchase (see rosewood turnings.) Although you can purchase high quality dowel plates, it's actually not too hard to make your own.  Today I'm going to use a shop made dowel plate from a tip from Hendrik Varju (from Passion for Wood.) 


Simply take a spare metal bracket, a high quality drill bit, and drill the size you want. In this case ~10.5mm.


Being careful not to waste wood, I cut 11x11mm pieces. (The missing section was the test piece.)


Next you need to whittle or shave the piece to rough shape taking off the corners. 


The dowel plate makes the final shape as you move the piece gently through with a big hammer.


Three down... seven to go. As always I'm happy to hear any comments or suggestions.

Friday, July 23, 2010

Breadboards: Part 3 - The Tenons

Of course complicated mortises require complicated tenons. This is the story of the breadboard tenons. The final dimensions are; the center tenons at 60x60x10mm, the end tenons are 60x40x20mm and the long tenon is about 17x10mm. Other than the center one, the mortises are 20mm wider allowing for 10mm bilateral movement.


After removing the edge material with a router and an plane the first step is detailed layout.


This is followed by some rip cuts at a slightly awkward angle.


A coping saw is then used to remove the bulk of the material between the tenons. This is tidied up with a block plane.


The two end tenons are from thicker timber and required some materal from the bottom. I used a rip saw at an even more awkward angle.


The last and most fiddly step is fitting the joint. This is tricky because the whole point of the process to keep the table flat which relies on a tight fit. At the same time however it needs to be loose enough  to allow lateral movement and be easily fit.


At this point I ran out of time...

Thursday, July 22, 2010

Breadboards: Part 2 - The Breadboards

The breadboard ends are 1020x150x40mm made from the same timber as the edging. Being oversized in length allows me to trim them back precisely when the top is finished and gives me a lip to grip to remove the board while fitting.


The technique I used was fairly standard. I used a drill press and a forsner bit to remove the bulk of the deep mortises. I squared the edges with a set of bevel chisels. Finally, I used a 6mm router bit to slowly make the long 10mm groove. Unfortunately I didn't get any photos of the progress shots.

Tuesday, July 20, 2010

Breadboards: Part 1 - The Design

Breadboard ends are a common feature of tabletops that attach at the ends and function to prevent cupping or warping of the top, reduce the amount of exposed end grain and improve the aesthetics. In a blog post far far away I wrote about the different types of breadboard ends and how they're made. Nowadays I use a a technique which is more complicated, more time consuming but has a number of advantages.

Lets revise. A long sliding tenon is the simplest and easiest to make. Glued only at the middle it allows the table to expand and contract laterally without issue.


The problem is if the tenon is short then the joint is weak if pressure is exerted downwards and you have little space to insert dowels. If you make the tenon longer then you make the mortise side weak and it can bow in the middle. I encountered all of these problems, though minor, with the blackbutt shaker table.


The way this is overcome is to have a series of longer tenons (which provide strength to the joint, and allow room for the dowel) and a long shorter tenon (such that the entire length is supported.)


Sunday, July 18, 2010

Layout Tips

When laying or marking out a project, depending on the task at hand I've been known to use a carpenters pencil, a mechanical pencil, a blue pen, a piece of chalk, and a marking knife. As I had the camera in the shop for a few progress pics of the shaker table I took a couple of photos to show how I attempt to accurately mark out cuts. 

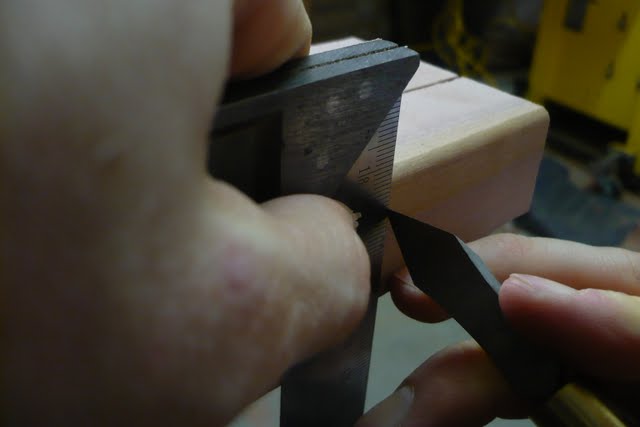
Step 1: The Marking Knife
The marking knife is the most accurate as it leaves the thinnest line. It also has the advantage that you can place a chisel easily and accurately in the resulting groove. It's disadvantage is you need to be aware that areas you cut will show in the final piece. The most important thing when selecting a marking knife is that it is diamond shaped so you can mark left and right sided. Here I'm using a Vesper Tools marking knife. 


Step 2: The Mechanical Pencil
A 0.5mm mechanical pencil will follow nicely along the groove made by the marking knife. This highlights the otherwise dull groove.
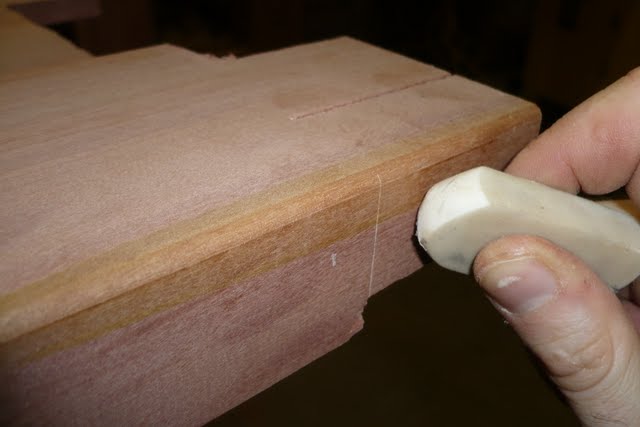

Step 3: The Eraser
This tip I picked up in one of the woodworking mags. By quickly running an eraser over the line you remove all the pencil other than that in bottom of the groove.
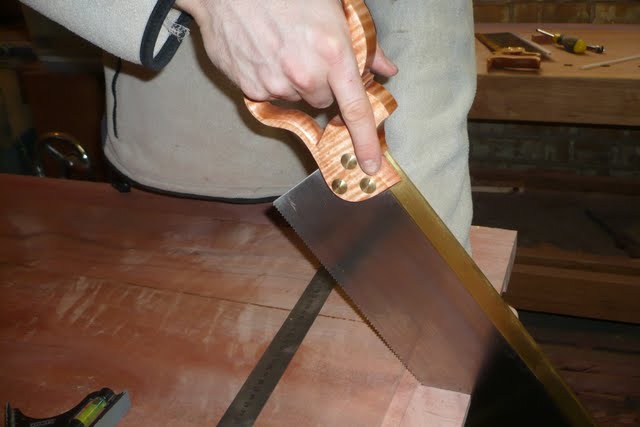

Step 4: The Chisel
The final step before reaching for a saw involves the chisel. Deepen the groove vertically (being careful not to bruise the fibers on the project side.) Then from waste side pare back to your line about 2-3mm, creating a |/ groove. This creates a track for your saw or chisel to work in.


The End Result
One of the end cap tenons for the table.

Friday, July 16, 2010

Underhand Dealings

An unusual step in the project the is the addition of some under table bracing. Four pieces, 18x40mm myrtle, have been shaped and screwed to the underside of the table. The function of these will be to add strength and rigidity to the top, and the two outer ones will serve as mounts for the leg trestles.


Sunday, July 11, 2010

Tenons Saws

After much debate, at the Sydney Wood Show I purchased the Lie-Nielsen 14" in 13TPI Rip and 10TPI Crosscut Tenon Saws. Out of the box these are beutiful tools. Soft curly maple handles. Folded brass backs. Clean and simple lines.


The conclusion of my research was that all the leading brands (LN, Veritas, Bad Axe, Adria, Wenzloff & Sons) are exceptional quality tools. I decided on on the LN saws because of two factors variety and avalibility. HNT Gordon only supplies the smaller tenon saws and the other brands I would have to import. I chose the 14" for personal preference as I my prefer slighly oversized tools.

Have you ever found that there are some people you just connect with instantly? It was like that for me the the 10tpi crosscut. Using this tool can be alikened to slicing fresh bread with a sharp bread knife. It easily, quickly and cleaning makes it cut.


On the other hand the ripsaw and I are still getting to know each other. When compared to my previous Stanely tenon saw this saw cut very aggressively. So aggresively it digs and jams. I found that not only do you not have to force the saw through the cut, you in fact need to ease some of the weight of the saw itself. After cutting a number of tenons for the shaker table bracing we are now starting to get along better.

Saturday, July 10, 2010

Ewww Pretty...

The center pieces for the Shaker Table is fiddleback (an alternating grain pattern) Tasmania Myrtle (Nothofagus Cunninghamii). Although, I've had the timber for 12 months, only now that it's dressed I can start to appreciate the colours and grain.  In these photos I've splashed the table with some methylated spirits to show how the timber would looked like oiled.


Timber sourced from Boutique Timbers.

Like at Facebook

Redbubble