Thursday, September 30, 2010

Response from Oneida Air

Hi Daniel,

 Thank you for expressing interest in our systems we are glad to hear you are considering us as an option despite the fact that we are so far away. There may be different options for shipping, the least costly option would probably be to look into a freight forwarder however I will give you the UPS rate to ship it directly from us to you. You will receive Practical after the sale service, as well as anyone who lived in the United States. We actually just have one facility in Syracuse, New York so we do all of our consulting, designing and trouble shooting from this location no matter where you are in the world. The 50hz units are compatible in Australia.

  1. 1.       The Super Dust Deputy would cost $289.00. If shipped via UPS the cost would be $523.24
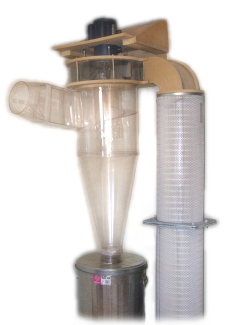
  2. 2.       The 50hz model is compatible in Australia. I have attached information on the 2hp 50hz V system. It would look slightly different…. This is an old picture. See the current web picture of the V system for actual design. Pricing is included in the document. Shipping to your post code via UPS would be $2817.93.


Again, your best option is to check with a freight forwarding company. If you do check, I would be very interested to hear the pricing that was determined. If you are interested in the galvanized steel cyclones for a 2hp/1500 cfm dust collector you would use the C950 cyclone.  The cost for that cyclone is $446.52. Shipping to your post code would be $1173.85

Please feel free to contact me directly with additional questions about any of our units or concerns about dust collection in general. I look forward to hearing your feedback.

Thank you,
D B
Oneida Air Systems Inc.
1001 W. Fayette St.
Syracuse, NY 13204


Monday, September 27, 2010

Tablesaw Safety: How to Use Kickback for Laying Out Joints

Ever heard of kick back? If you haven't you should never use a table saw.
Check out this post over at the Wood Zealot's Worshop Blog. 
A great example of a terrible way to mark out dovetails.


Saturday, September 25, 2010

Dust Extraction - Cyclone Suppliers

Dust!!!
If you are wondering why the photos of my shop were blurred... It's not a camera problem, it's the flash reflecting of the dust in the air. I admit it, I have a serious dust problem. My 1HP carbatec dust extractor is just going to cut it. In fact often it's so clogged up with chips from the thicknesser they just pile up on the floor. In the next few blogs I'll be exploring dust extractors and air filters as I try to get my shop cleaned up.

Oneida Air Systems - website - US$700-3500
Maker of the very well regarded Dust Deputy, American company Oneida Air is one of the premium names in the world of cyclones. However, they are only available in the USA. Although they could be imported there would be considerable cost in shipment and electrical compatibility issues.


Carbatec - website - AU$2000-2700
Carbatec sells two styles of cyclones in 2 & 3HP. As far as I can gather these are re-branded Taiwanise machines. The great advantage of these is I can take my trailer to Carbatec, swipe the magic plastic, and it's done. What makes me hesitant (other than cost) is that a search of the forums and google reveals little in the way of people's experience with these machines.

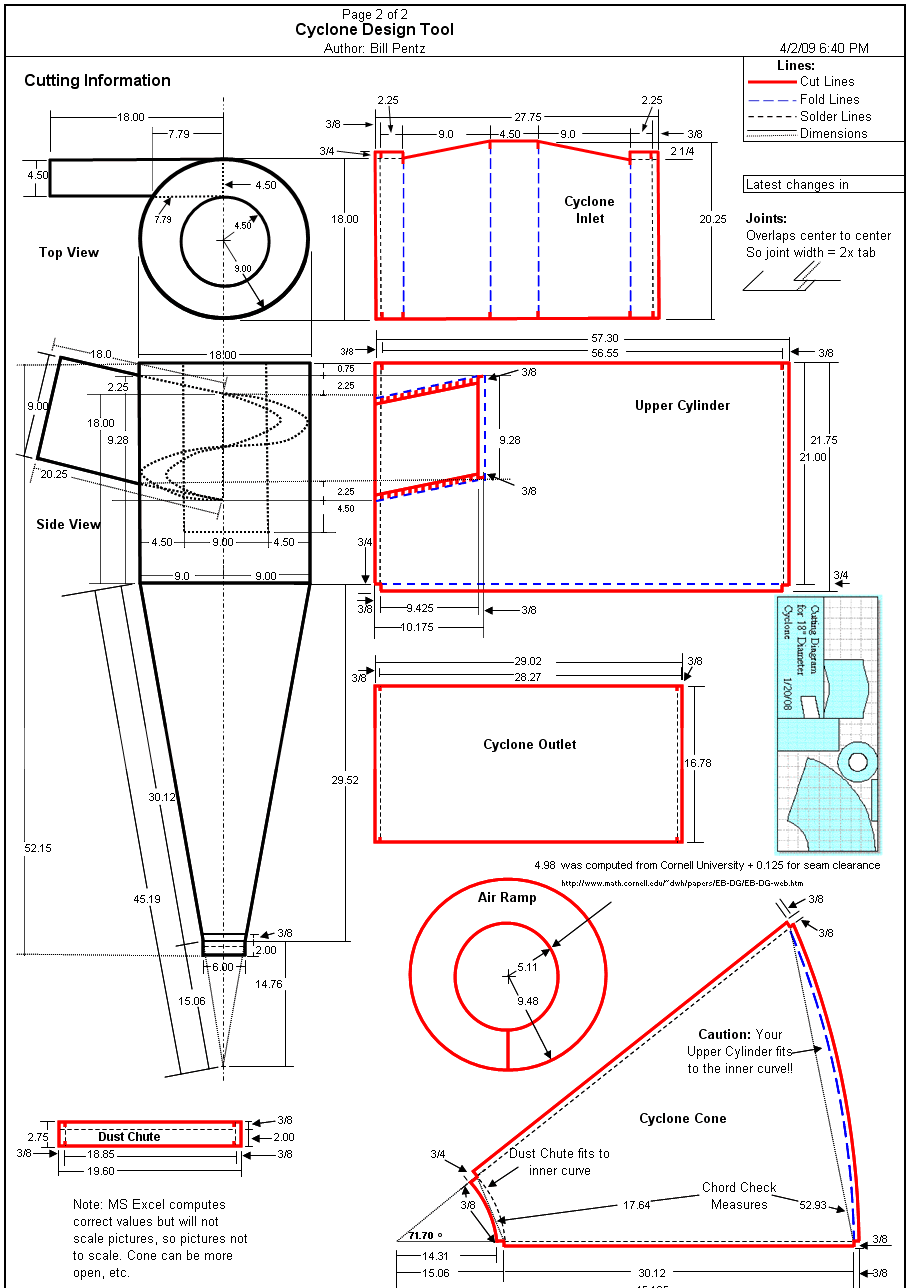
Bill Pentz - website - free
The most famous name in the world of cyclones is Bill Pentz. This man is regarded as a cyclone expert, who has done to the research and the maths to calculate the optimal design. Although the information is free it is at the end of the day only information and plans. I still need to gather materials and have time to build the thing. Without electrical and metal working experience, that's not as easy as it sounds.


Clearvue - website - US$1640
Clearvue is an American company that builds perspex Cyclone units and components based on Bill Pentz design. They can be imported to Australia. Apricotripper's (from the Woodwork Forums) imported and installed a Clearvue (below right) (link). There was a rumour earlier in the year that they were closing down.


Sheet Metal Fabricator
Another alternative would be to hire a sheet metal fabricator to custom build the Bill Pentz design. Although this would be expensive when compared to the high cost for the above units... it may be a serious option.


Thursday, September 23, 2010

New Products from Benchcrafted

Despite the fact that my Roubo is technically still not finished, the temptation to start planing and building the next bench is growing. Benchcrafted have not helped the situation but announcing two new products.

The first is a shaker style bench with a wagon/leg/deadman configuration. The innovated aspect of this build is the parallel guide and wheel mounts are concealed, held within a cardboard  at the end of the bench.


The second product is a little more subtle but I think is a real winner. The wheel handles on my bench are the standard benchcrafted chrome. Benchcrafted is now set to release a cast iron model. The finish would be much tougher against the inevitable knocks of a workshop tool, and with one construction step removed (the chroming) may actually be cheaper.


Sunday, September 19, 2010

A land where I am King, my Shed.

My wood-shop began its life as a humble single bay garage in suburban Newcastle. Although there's always upgrades and add-ons I'm pretty happy with it. It's organised. It's productive. I just wish I had more time to spend in it. The shop is in a constant flux of re-arrangement. Here's what it looked like in May.


I don't have many machines but want I do have is extremely useful. In this photo you can see my woodfast 310PT jointer/thicknesser combo, a small 1HP carbatec dust (so often over worked), and a carbatec drill press. The cupboard in the corner holds my sharpening equipment.


This is my shelving that holds tools and specialty timbers and medium size offcuts. The red tool box holds my hand planes, chisels, saws, and marking items. The grey box holds jigs, tapes, and safety gear. The shelf above holds sanding equipment and some power tools. Above that are specialty items (screw drivers, drill bits, die & tap set, etc) and some liquids I like to keep on hand (some danish oil, glues and shellac.)


Making use of space; a trolley makes a handy clamp rack.


The next shelf is less interesting. This is the non-house non-woodworking shelf - mainly gardening, car, and camping gear.


Unfortunately,  the laundry in this house is the garage....  In the corner you can see some trestles I found at a church spring clean. I re-oiled them and covered the tops with some scrap carpet to make some nice saw horses.


Here you can see the blackbutt roubo (still under construction). I think it was well worth while to re-arrange the entire shop so that it would be in front of the window.


Out the front I found a spot where I could store some timber. The Tasmanian Mrytle that made up the bulk of this pile has been put to use in the Anniversary Table Project.

Monday, September 13, 2010

Greensabbath's Computer Case

Here's a very intriguing computer case I saw on Lumber Jocks. Nick (Greensabbath) from Nick Falzone Design has come up with this very interesting wooden shoji case solution.

Click for details: Sangaku Computer Case


Saturday, September 11, 2010

Hand Cut Tenons

As always in woodworking the first step is marking out. To form the tenon I needed to remove 6mm of material on each face, and 15mm at each edge. For this task I use a vesper marking knife, a veritas wheel guage, and a square. (See layout tips.)


The first cut is done with my 14" LN rip tenon saw to cut down each face.


Under the dust you can see I'm using a Bench Crafted vice in the sliding position to secure the piece. A simple tip from Derek Cohen  (In the Woodshop) was to have the board at an angle away from me, changes the rake vs fiber angle, and greatly eased the sawing action.


Contrary to how this photos appears I do actually saw with my eyes open.


The next step, using the rip saw again, is to cut down each edge. 
To remove the waste material at the shoulder, I secured the piece with a bench dog and hold fast, and used a cross cut saw to cut down the shoulder.


And there we go. One tenon ready for a little tidying with a rabbet plane for a nice snug fit into the mortise.

Sunday, September 5, 2010

Hand Cut Ebony Inlay

It may not be the clearest photos but I've been able to shape the top supporting piece.
Along the join of the curved leg pieces I've inlaid some ebony.


Future plans:
For the vertical supports I'm thinking of curving them in a little in an hour glass sort of fashion. They are looking a little wide at present. To join the middle stretcher I though I would use ebony wedges.

Friday, September 3, 2010

Camphor Laurel (Cinnamomum Camphora)

Camphor Laurel is a distinctive timber. It has striking colour varigation - ranging from a pale cream to dark greens and greys. It has a dinstinctive smell (that some people like.) It's easily avalible. It's cheap. It's commonly used in medium grade custom furniture. Some people absolutely love the stuff.

But for me... I don't like it. It's hard to match colours. It's hard to tolerate the smell. It's an imported exotic which doesn't reflect beutiful native timbers. But that's just me.

And then there's other people who really don't like it. http://www.camphorlaurel.com/ - 57 Reasons why Champhor Must Go.

Thursday, September 2, 2010

Sliding Dovetails & Curvy Legs

I debated the leg design long and hard. The problem is keeping it thin and eloquent yet strong and durable. I thought of steam bending, bent lamination, straight grain timber, and all combinations of the above.

In the end I decided to join two pieces to maximize long grain strength... which of course means a joint in the middle.

After making a template, rough cutting and machining the piece, I then used a jigsaw to cut a closer but still rough outline of the leg.


Using a chisel, a marking knife and some patients I outlined my cuts.


And then started making some cuts...


Which made me a sliding tail...


...and long pins...


With a bit of glue I got a rather nice joint.


Like all wood workers I'm my own worse critic. There are some gabs in the joint and between the two pieces. Some will need filling, some may need to be made a 'feature' of to correct. (Eg. one side as a 1-2mm gap on the face side, this may be replaced with a strip of timber mrytle or perhaps ebony.)

For those wondering about how the vertical leg piece will attach. I plan to use two small wedged m&t joints either side of the sliding dovetail.

Like at Facebook

Redbubble