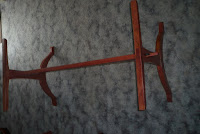
I don't have a lot of 'flat pack furniture.' Most of the time I stay clear of Ikea. But there's not reason that custom solid timber furniture can't be solid when assembled and conveniently flat when transported.
Monday, June 13, 2011
Lectern Design
 With the Shaker Table complete it's time to ponder my next few projects. After a big shop clean up and the construction/installation of the lumber rack I'll be working on some furniture projects for the local church. The first and most complex being a lectern.
 The design brief: simple single column construction, adjustable in height (0.9 to 1.3m), table to hold 2 A4 pages, and two XLR panel mounts for gooseneck microphone and LED light (with cabling tunneled within). It will of course be solid timber (cedar and huon most likely), dovetailed base and top, and probably an inlayed cross.
Getting the proportions and the visual weights of the different elements I see as the biggest challenge.
Sunday, June 12, 2011
Groggy's Workbench
Click here to see the complete forum thread (you'll need to be registered user to see photos and join in discussion.)
Tuesday, June 7, 2011
The top attaches to the bottom...
Transporting a 2x1x1m table is an epic task. Not only is the weight a hassle, moving it through downs and around corners becomes near impossible. To make this easier the table is design to break down into pieces. First the legs are held together with the keyed tennons (easily tapped into place) and then screwed/bolted up into the tabletop.
The first step in the process is the supports beneath the table. Four 20mm supports stretch under the table and support the thinner (20mm) fiddleback mid section to the thicker 40mm edge pieces. Slotted holes allow for horizontal wood movement while simple brass screw stay in position. Because these sections won't normally need to be removed a screw works well.
Connecting the legs to the support is a different story. These need to be able to tightened and taken apart multiple times over the lifetime of the project. Threading the wood or inset nuts are ok, but I find they wear and fail.
For this project I'm using 3/16" brass nuts and bolts. I used the leg to mark where to drill. Then counterbored with a forsner bit. With the support removed from the table I could tighten the bolt while holding the nut. Then I filled the counterbore with... epoxy. Leave to set. (Not forgetting to remove the bolt.) A quick sand and oil. And we're done.
Sunday, June 5, 2011
Refining the Center Stretcher
Construction of the Anniversary Shaker Table is in the home stretch. Today with the stretcher held securely to the bench I could finish some of the details. A nicholson fine rasp, a cheap riffler and some sand paper made quick work of rounding the edges and fitting the joint.
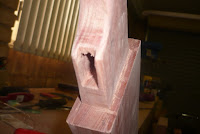
Holding the stretcher to the legs are keyed through mortise and tennon joints. I made the ebony keys quickly with a chisel and saw. Although a quick and fun way to build... the lack of planing caused one small hassle. A combination of a slight difference in the angle of the key and mortise and leaving the short grain too short caused a small blow out at both ends. The solution... it's now a design feature...
Wednesday, June 1, 2011
Oiling the Benches
Progress may be slow, but progress is progress. One bench is finished and in the house. The other is finished and airing in the shed. Yesterday I put the last coat of oil on it. Using 0000 steel wool I rubbed in a third coat of Organoil wiping the excess with paper towel. After a month or so I'll come back an add a very thin layer of wax. Now onto the legs for the table...
Saturday, May 21, 2011
Woodworking on Holidays: Queensland Museum
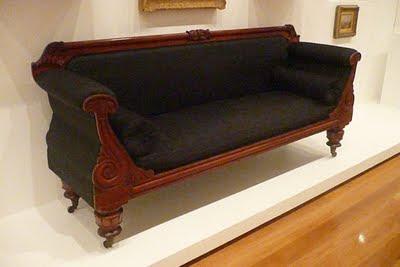
Next door to the Queensland Art Gallery is the Queensland Museum. The Museum had a very extensive collection of natural history (including Dinosaur fossils discovered in Queensland) and human history (including household items from before Christ). It also had a number of wooden items.
Friday, May 20, 2011
Woodworking on Holidays: Queensland Art Gallary
Just a few photos from our recent trip to the Queensland Art Gallery. On display was a variety of wooden pieces representing several eras of Australian history (pictured below) as well as some historical international pieces. The Gallery itself was easy to access and quite pleasant to stroll around.
Saturday, May 14, 2011
Experimental Filling...
The first thirty minutes of shop time I've had in 6 weeks was spent reviewing the pews. It gave me an opportunity to see the results of various filling experiments I tried on the project. (Of course it's recommended do technique 'experiments' on scraps prior to the actual project, but this time it's on the project.)
The first 'filling' job was the plugs to cover the screws. Made with the Veritas Snug Plug cutters from Indian Ebony these proved to be highly successful. (But ebony is not cheap). The plugs simply tap into to place and hold with glue. To finish simply flush trim and sand.
The first Epoxy experiment was done using the west system microfiber system. The microfiber in fine powder forms acts to thicken the glue and allow better filling properties. However, this also tinges the filler white... not such a good look.
Next up with have microfiber with fine saw dust. Allow I've had success with this technique in the past this time it made the filler appear heterogenous (ie. tinged white with flecks of reddy brown). Better but not there yet.
My final option was black oxide. This carbon like powder is designed to colour concrete and is dirt cheap. Used with or without microfiber it made a solid homogeous filling agent. Perfect... well if your wanted black any way.
Defects that were exposed to the element while the tree was standing often have a black edge. I presume this is related to oxidation within the wood. Filling these gaps with black filler is effective.
For other colours, such as to match the reddy brown, I would try even finer saw dust (such as that out of the sander) or turn to dyes and stains to turn that white tinge what ever tinge you want.
Epoxy has a significant advantage over water based fillers such as 'putty' - strength. Epoxy can seep into the defect, completely fill it, then set harder than wood, holding the defect together. This strength is essential to fill large defects and stablise burls.
Thursday, May 5, 2011
Woodworking on Holidays: HNT Gordon Smoother
A smoothing plane is an incredibly useful tool for both hand tool and power tool enthusiasts. Presently I lack a dedicated smoothing plane (instead using a no 5, or abrasives.)
After much inward deliberation and hands on comparison at the Sturt Open Day I decided the HNT Gordon a55 was the plane for me. (The other main option was the LN 4 1/2, however, the handle configuration was crowded and less comfortable and the cost greater.)
Unfortunately, the day I was passing HNT Gordon the shop was shut for Easter... so I'll wait for the next wood show...
Hmmm. That wasn't the best of stories. Oh well... always happy to plug a quality Australian producer.
Subscribe to:
Posts (Atom)


![View in fullscreen [Press F11] Fullscreen](http://btemplates.googlepages.com/fullscreen.gif)


.png)