Sunday, October 26, 2008
Tabletop Construction pt. 2
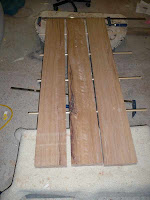
As a woodworker, you won’t be able to escape the essential skill of forming flat boards. For our large tabletop we’ll need to join several boards together. There are several techniques at your disposal. The choice of your project will often depend more on your available equipment and time than issues of strength and design.
The simplest option is a “rub joint”. This simple joint is formed by jointing the surfaces so they are flat and smooth and gluing the long grain together. Simple.
This joint is not often used as it has a problem. With seasonal variation and the natural movement of the wood the wood can warp and the boards can move reletive to each other. Not a good look.
This movement can be prevented by using a "mechanical joint." This is where in addition to glue the boards are physically limited by a piece of wood which crosses the joint.
Dowels or loose tennons are a simple option. Simple to install with a dowel jig and drill.
Biscuit joints are one of the most popular options. With the use of a biscuit joiner they are faster to install then dowel and provide good alignment and strength.
Spline joinery is also simple and effective. A groove is cut in each piece on a table saw, router, or biscuit joiner. An additional piece is cut to match and glue in place. Splines with grain perpendicular to the boards provide addition shear strength.
A sliding dovetail joint is an attractive alternative to the spline. It is more difficult to cut but provides mechanical stength vertically and horizontally.
Tongue and groove joinery doesn't require additional wood but it does come at the cost of width of the origional boards.
Thursday, October 23, 2008
Breadboards

Have you ever wondered why tabletops often have perpendicular end boards? Is it structural? Is it purely design?
Well the end boards are called “Breadboards” and they are both for design and structure.
Structure
Structurally, they are designed to help prevent the tabletop cupping. As wood expands and contracts with the passage of time and the moisture content acclimatises to the environment the perfectly milled boards may warp, cup, twist, and do all sorts of things. Similarly to attaching an underlying brace Rigid breadboards hel
p to reduce cupping by keeping the boards in line. (Although this is what most people would say I’ve heard Christopher Schwartz teach that he’s doubtful as to how important this is. Youtube Link.)

You can attack breadboard in a number of ways. The most important point to remember is the direction of wood movement. Throughout the year as the moisture content changes solid timber expands and contracts. Different timbers expand at different percentages. The majority of expansion occurs in the plan perpendicular to the long grain. When you design your joinery it must allow the main boards to expand and slide and it must remain attached to the end.
Tongue and Groove
The simpliest joinerty is to use a tongue and groove. This can be down with a router or saw and cleaned up with a shoulder plane and sandpaper.
Stopped Tongue and Groove
Often its preferred to hide the joinery. Simply stopping before the end achieves this with little hassle. The groove cannot be cut on a tablesaw but a plunge router, drill press or hollow chisle mortiser will be effective. This is the plan for the shaker table.


.jpg)


.png)