Friday, December 17, 2010

Church Project

On a Sunday night you'll find me at St. Philip's Prebyterian Church (aka. St. Phils, or Surfside.) The church is in the process of moving to a new location. As part of the move I offered to make some new furniture. At this stage it looks to be up to three pieces, a lectern for preaching, a companion piece (to hold lap top, tissues, water, notes), and a small communion table.

The lectern is essentially a tilted table to hold an open A4 folder (~30cm x 45cm) at an appropriate hight for the preacher to read. Other bonuses include a microphone socket, a light, electrical connections for lap top etc, storage for water and books. Suggestions from the pastor includes 'keep it simple', 'adjustable height', and 'rustic and natural edge'.

A Selection of Lecterns from Google Images
At this stage the most likely design is a simple single column adjustable height lectern with a single XLR cable within the column for a gooseneck microphone on the table. 

Shed Upgrade: Industrial Fan

The shed can be a hot and dusty place. For climate control I've been using a $15 domestic fan... which was limited to say the least. Today I set up a new 30" industrial fan that was on sale at Gasweld. It should serve to cool the hot days and send the dust out the back.


Thursday, December 16, 2010

Finishing Time

I've nearly completed two projects ready in time for christmas. One box is for my nieces (aged 1 and 3) and the other my daughter (aged 9 months.)


Currently they have a layer of thin de-waxed shellac as a sanding sealer. I debated for ages on what finish to you. I thought of paint or even chaulk board paint and let them cover it. But then decided on a stain to show off the grain and joinery. 

Keen to try something new, I bought some Feast Watson liming solultion with a cedar stain to make the pieces a subtle pink. However, I mixed up half the solution and it wasn't so subtle.


Hmmm. I could ignore the stain and just continue with the wipe on poly. Or just go ahead. In the past I've always used old baltic stain on pine with good results.

Any thoughts?

Tuesday, December 14, 2010

The Lids


The solid pine lids for the two boxes is complete and ready for finishing. Two boards were matched for grain and rub glued together with titebond III. The pieces then cut to size with the circ saw and guide. The edges were than rabbetted first using the LN rabbet block plane and a offcut as a guide and then the LV plow plane. (The reason for this was the plow plane which lacks a knicker caused significant tear out when used across the grain, the plow plane was used to finished due to a faster action and depth stop.) The groove was cut quickly and easily with the plow plan. The middle 4" is glued with titebond three (to allow expansion). A LN hand saw was then used to trim the edges. The corners are curved with a saw and rasp. The edges a 1/8" CMT round over bit in a bosch trim router. The pieces are ready to final sanding.

Monday, December 13, 2010

A Clang and the Dusty Died

Today my dusty died.

I was working on the toy chests for christmas. I was cutting the curve on the base moulding with a jigsaw when I heard a clang, followed by a change in pitch of the dust extractor hum. My 3 week old dust extractor.

I cut the power and walked over to explore.


The impellar case was split... a ding in the curve... and some paint missing. 


I found this block of wood. A little big for a dust extractor... about 20cm long. (Tells you it's got some power.) I had the 4" flex hose sitting on my project next the jigsaw. It was doing a good job. Something moved and the hose fell to the ground... I didn't think much of it and kept cutting. I didn't think it would find an offcut below me.


I removed the hose mounting to explore inside. A single blade has been bent near flat.

So dusty is out of action for a while. Need a proper repair on this one.

Any tips on fixing it would be more than appreciated.

Sunday, December 12, 2010

Base Molding: Part 2

Time has been a little tight but we still should be completed for Christmas. Fingers cross. After shaping the round over I joined the base moulding together. One box received more dovetails, the other a simple mitre.  

The mitres are surprisingly ok considering they are handcut without a guide or good layout. The main gaps annoyingly are related to slippage during gluing rather than poor cutting. Next time I will use dowel or screws to align everything.

The four sides were glued to the case and the mitres/doevetails fitted around that. 

I used my sketch up design printed 1:1 to layout the curves. I used woodglue to glue the paper to some MDF. Then used the MDF as a layout guide. The cuts were made with a jigsaw.

To go: finish the lid, sand the curves, round over all the edges, sand everything, lime, stain, varnish.... 12 days, 11 of which will be at work...


Friday, December 10, 2010

A solid base for the christmas boxes


There are several ways to form the base of a chest. The simplest option is a piece of sheet good such as plywood... but at the love of wood we prefer solid timber. The problem with solid timber is that it expands and contracts as the humidity changes. Any design needs to take this into consideration or come a humid season your box will fall apart!

There are several options to use solid timber. A useful and recent article in Fine Woodworking nicely explained using solid timber in a frame and panel method. 


Another method is to use 3-4" strips in a tongue and groove or slip matched fashion. This is the technique I used for the shelf on the roubo bench.


The bases for the Christmas Boxes are made by a single piece of radiata pine held captive (free of glue but floating constrained) in a groove around the case. After cutting to size, tongue and groove were formed with the small plow plane.


Wednesday, December 8, 2010

Base Molding: Part 1

The base molding for the Christmas Shaker Toy Chest is a simple hand planed round over. The process is rather simple...


First mark how far down the face the curve will go. In this case I measured the thickness of the timber with a combination square and followed it with a mechanical pencil.


On both ends mark your curve. I used a pen (because it needs to be clear, and will be on the scrap side) and a roll of micropore tape (because it was handy and roughly the size I wanted.)


I then secured the piece tightly on the bench.


Planing a curve with a straight plane is a simple matter of making a polygon and gradually increasing the number of sides. With a sharp no 5 jack plane I then hand plane at ~45 degree to the curve of my circle. This forms two peaks  (at 22.5 and 67.5 degrees). I then plane those to the curve. I continue this process until it close to the curve.


For the final passes I switch to a block plane set for finer shavings. And finally some cloth backed sand paper makes everything smooth.


The next steps will be to join the pieces (more dovetails), attach it to the boxes (more glue and clamps), and cut the curved legs.


One day I'll acquire some molding planes (such as those from HNT Gordon) and form more complex designs. But for the time being a simple round over works a treat.

Thursday, December 2, 2010

Toy Chests for Christmas


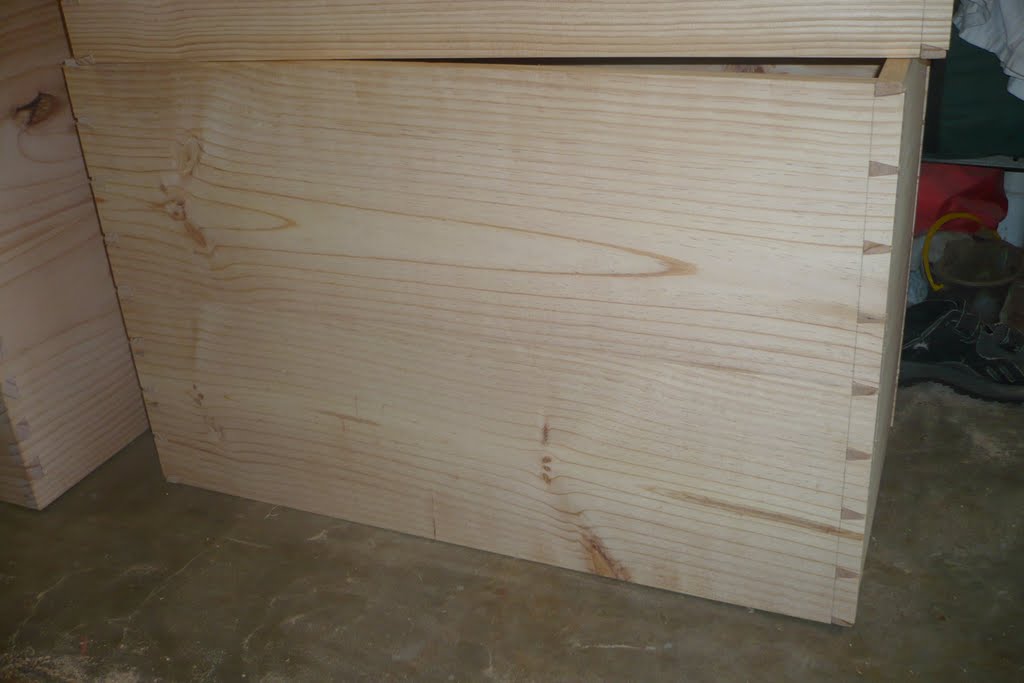
For a while I didn't think the toy chests would be made in time, but after two busy days in the shop, it looks like the kids will have toy chest come Christmas. The dovetails dry fitted together and look good. I was very pleased that the first few slide together without fine tuning, but was disappointed by some that needed a bit more work. The apprentice didn't seem to notice though.


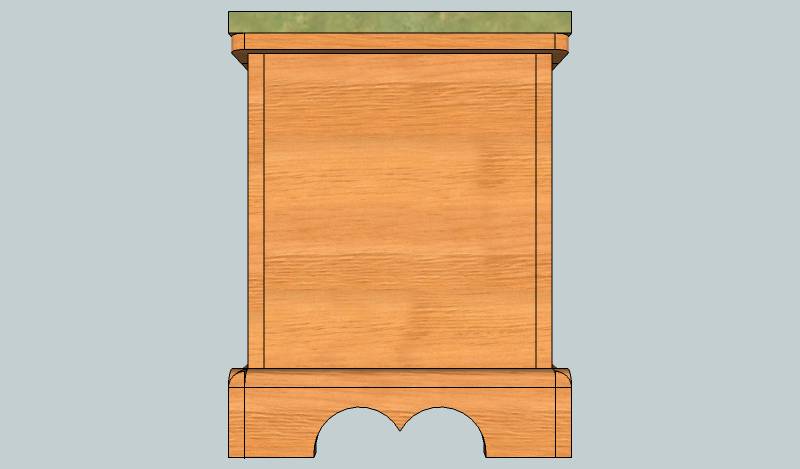
A sketch of things to come....
There's still a lot of work to go. I need to prepare the base moulding (crosscut, rip, dress, join, shape, round over), the top (tongue and groove breadboards), the base board (crosscut, rip, join), the inside tray(s), then there's the sanding... endless sanding... and finishing...


Wednesday, December 1, 2010

Wax Melter: The top comes off...


With the dovetails cleaned up the top section was removed with a circ saw to reveal the shape of the melter.

Like at Facebook

Redbubble