Other Blog Pages

Thursday, December 12, 2013

Electrical Work in Progress

Here's a few photos of the electrical work in progress.


There are many options in providing lighting for a workshop. After much reading and pondering I decided on bayonet mounted domestic LED bulbs, in particular iGlobe 9w warm 2900k 100w equiv. 16 mounted in the workshop and 4 in the storage bay. I selected a large number to reduce shadows and have even lighting. (The exact number was determined by the rafters layout.) The bulbs are all the same brand, power, and temperature.  

The three main options for lighting were traditional fluorescent tubes, bayonet mounts, or LED strip lighting. 

Fluorescent are what people expect in a workspace. However, they hum, take time to warm up, flicker on warming up, and then flicker with AC current. LED strip lighting is new and perhaps the cheapest. However, it relied on transformers and offered little back compatibility or flexibility.  

The bayonet mounts with LED bulbs were the best compromise. Additionally even with the expensive LED bulbs the installation cost is less than half that of a fluorescent.  They are cheap to run, offer consistant light, switch on instantly, and are said to last 50,000 hours.    

I was also given a large mercury vapour light which I'll mount in the centre. This should add some character to the shed.


The majority of domestic outlets in Australia are 10A 240v which isn't quite enough for the larger 3-5hp machines. The workshop now has 6 x 15A outlets offering plenty options. (Note the 15A sockets have wider earth pins so that you can't plug a 15A plug into a 10A socket.)

I also had the opportunity to install a single three phase outlet. As I don't have any three phase tools this may be overkill. However, I wanted to future proof it as much as I could, and hopefully make my little workshop more attractive if I was ever to sell it.


A work in progress... 

Monday, December 9, 2013

Electrical Work Begins

Today the Electricians arrived to begin work on the shed. Its an exciting prospect given it has been about 10 months in the planning. The current plans should have enough power and flexibility to future proof the shed.

Details
  • New 32A three phase sub-main, from the location of the existing meter box to the RH rear of the residence, then underground to the approx.. center of the proposed work shop area.
  • 12 pole D.B in the proposed new workshop, c/w main switch and ELCB,s for light and power circuits. 
  • Twenty One (21) batten holders (16 – in the workshop, 4 in the storage area and 1 in the carport.) LED lamps to be supplied by owner.
  • One light switch for the workshop, one light switch for the Storage Area & one weatherproof light switch for the carport, and one 2 gang switch for the ceiling mount GPO’s.
  • One double weatherproof power point in the Carport.
  • Two ceiling mount double 10amp power points.
  • Four 10amp double power points.
  • Four single 15Amp 240volt power points in the workshop.
  • One double 15Amp power point.
  • One three phase 10A power outlet.
Re: Ray's question. The sub main is on the right hand side inside the door where the switches will be easy to reach. The scrap bin is easy to reach across at that point, but I may yet move it.

Sunday, November 24, 2013

Electrical Layouts

At this stage it looks like the workshop will have power before Christmas. It's all become a little complex (cough cough expensive) but it should allow for ample power and flexibility now and into the future. Plenty of 15A outlets, plenty of lights, and even a three phase. Any feedback is appreciated. 


Monday, September 16, 2013

Potter's Pal's Carrots

This post follow's up a post earlier in the year when I planted from heirloom carrots in newspaper pots. The experiment was a mixed success. The pots while out of the ground dried out quickly and I lost a number of seedlings. In the ground after transfer they did a lot better. Next time though I will have smaller thinner pots to help the breakdown of paper. 


Tuesday, August 27, 2013

End of Winter

With the end of winter rapidly upon us, the garden is starting to spring into bloom. The vegetable raised bed is not quite ready but progress is being made. The site is excavated by hand. Drainage pipe laid. Timber beginning to come together with halflaps, wooden dowels, and dovetails.  


Wednesday, July 17, 2013

50" Rip Capacity.


The 50" rip capacity rails arrived a few weeks back and have been attached to the machine. Looks pretty. Still no power to the shed. 

Wednesday, June 26, 2013

Garden beds by a furniture maker

While the shop continues to be without power my focus has remained on the gardens. I'm installing various garden beds and in particular a large one on the north side of the shop. This bed will be 5.4-6m long x 1.2m wide x 0.5m high, made from 2.4m x 1.2m x 50mm Tallowwood sleepers. A simple task to cut to size and screw together... however... I don't like simple. Rather than simple screws I've decided to dovetail the joints. In a sense treating the project as a rather large chest or blanket box. 


To begin with I've used hardwood dowel and titebond 3 to joint the end pieces.


I've recently acquired a  Makita BDF459SHE brushless drill. This is a piece of kit I can definitely recommend. Plenty of power. Not too heavy. Holds a charge well.


I used the circular saw to trim the ends using a MDF guide and a Chris Vesper Square


Then laid out the joints like I would any other. 


However, the dovetail saw stayed in the toolchest and the 4351FCT Jigsaw did all the hard work. 


A slight deflection in the blade resulted in some angled cuts. However, repeating the cuts on the other side and adjusting the oscillation of the saw resulted in a good result without chiselling.  


The site of the future Northside bed. I've be excavating slowly by hand to level it and remove rocks. I'll also be placing a drainage channel along the edge. 

Joining the sleepers end on end will be a little tricker... perhaps finger joints, perhaps half lap... proper scraf joints made be a little too much. 


Saturday, June 15, 2013

Thursday, June 13, 2013

I'm in the process of deciding on Shop Layout before locking in the electrical wiring plans. FineWoodworking make a handy shop planner which was faster than my attempts in SketchUp. 


The shop is 4.8x5.4m. Main tools are a tablesaw/ router combo, jointer/ planner combo, 14" bandsaw, 3hp dusty, drill press, large workbench, large tool chest, and the shelving. All the tools are wheel mounted.

The bandsaw and jointer/ planner combo are used for initial milling/ machining and therefore have long pieces to deal with. Hence why the bandsaw is near the door (and probably jointer should be swapped with the drill press.) 

The tablesaw/ router combo is quite large and I'd like to keep it central. 

The dusty I may move to the other side of the wall.


Sunday, June 9, 2013

Further shop set up...

The old green shed is starting to look more like a real woodwork shop. The shelving is installed and going to good use. The tools are unloaded and put in their place. Various machinery settling into place. The bench positioned, wheels removed and vices installed. General tidy up and rubbish removal. (The engine crane and scrap bin in the photo is planned to go to storage.)


The shed's second section will be dedicated to storage. Ultimately I'll place a large wood rack on the wall, and move the scrap bin in here. 


Next to the shed I've dedicated an areas 1.2m x 5.6m for a raised vegetable garden bed. Because of the slope of the hill this has meant shifting a lot of soil by hand. This should be installed in the next few weeks. 


Thursday, June 6, 2013

Metal Shelving Installed


The metal shelving is finally up and operational. It is made from a collection of cheap Hand Storage kits that I've acquired over time. The shelves are shallow (1') and are only rated to about 20kg but they certainly do the job. For extra stability I've screwed them to the hardwood shed frame. The kits are designed to be 6' tall but in this configuration are closer to 11'6" and stretches most of the north wall. Time to get organised. 


Saturday, June 1, 2013

New Supplier: Pilliga Natural Timbers


I'm testing out a new local timber supplier - Pilliga Natural Timbers. This time I'm not looking for 'cabinet grade' timber but rather timber for the shop and yard. After debating various materials I've decided to use Tallowwood (Eucalyptus microcorys). It is naturally termite resistant and has a high durability in wet or damp conditions. Perfect for garden uses.  I've ordered 15 - 2400x250x50mm sleepers and 80 l/m of 150x30mm timber and am expecting delivery soon.


Cleaning Shop: North Side


The new shop is divided 2:1. The smaller north side section is going to be dedicated to timber storage and gardening equipment. This is how it looked a month ago. Today it looks a lot better (but I don't have a photo). The timber cleared out. The rear shelving removed. The metal shelving in the main section. Everything gone. I high pressured water cleaned the ceiling and walls and it's all starting to look a little organised.


Wednesday, May 22, 2013

South Side Garden

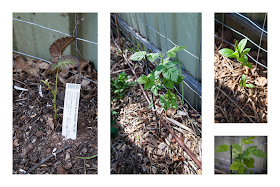
With still no power to the shop my hobby time has been spent in the garden. The south side is coming together well. I've extended the fence with 2.4m star pickets and attached 2mm wire and 100mm square mesh. On that I'm growing passionfruit, kiwiberries, blueberries and I'm awaiting my order of grape vines. The beds will shortly be fitted out with strawberries (waiting on a order of 36 plants) in the middle and cranberries to the west. Still deciding on the east side.  All plants purchased through the Diggers Club.

I've been impressed with the rapid improvement in soil in only about 3 months. I've incorporated about 240L of various manure, a dusting of blood and bone, and then about 2-4 inches home made much. After being turned a few times the soil is starting to look rich and black.  

I plan to use tallow-wood hardwood for all the garden edging. 150x25mm for garden edging including this strip and 200x50mm for the vege beds.

In this most recent photo you can see my attempts to help with the frost by using old shear curtains as covers.


The Hansa C4 has done a fair amount of work and produced some fine mulch. I've had the blade sharpened once and it's due again. I've decided a mulcher is an essential gardening tool. However I have mixed feelings about this model. Still deciding... as always probably should have got the bigger model...


Wednesday, March 13, 2013

Shop Layout

Keeping my tools (new and old) safe during transport resulted in a lot of packaging. With things unloaded the shop floor was littered with cardboard, metal straps, plastic straps, hard foam, plastic wrap, and bubble wrap. With that cleared out and the majority of machines reassembled I can start to think about layout.


The shop space is 5.4x4.8. Major items include the workbench, table saw (50' rails still to arrive) with included router table, jointer / planer combo, 14" bandsaw, dust extractor, drill press, and wood scrap bin. I plan to keep the metal shelving on the left. The bench on the far wall. The tablesaw in the middle. But then the tetris game gets messy.